

Information on this lesson has been updated since it was first published. Continued experiments with glass painting techniques that employ the use of an electric kiln provided some new information that I'd like to share with you.
The ongoing experiments in the art studio have resulted in the following information:
Using a base coat of white glass paint yields a completely different result than using a base coat of white glass enamel. When white glass paint is applied and fired onto the glass as a base coat, it seems to look more translucent after the colorful layers of paint are applied. However, if white glass enamel is fired as a base coat, the subsequent layers of paint tend to appear more opaque. In conclusion, there is a subtle difference between white glass paint and white glass enamel. Choosing which white glass paint to use depends on what kind of design the artist is desiring to achieve.
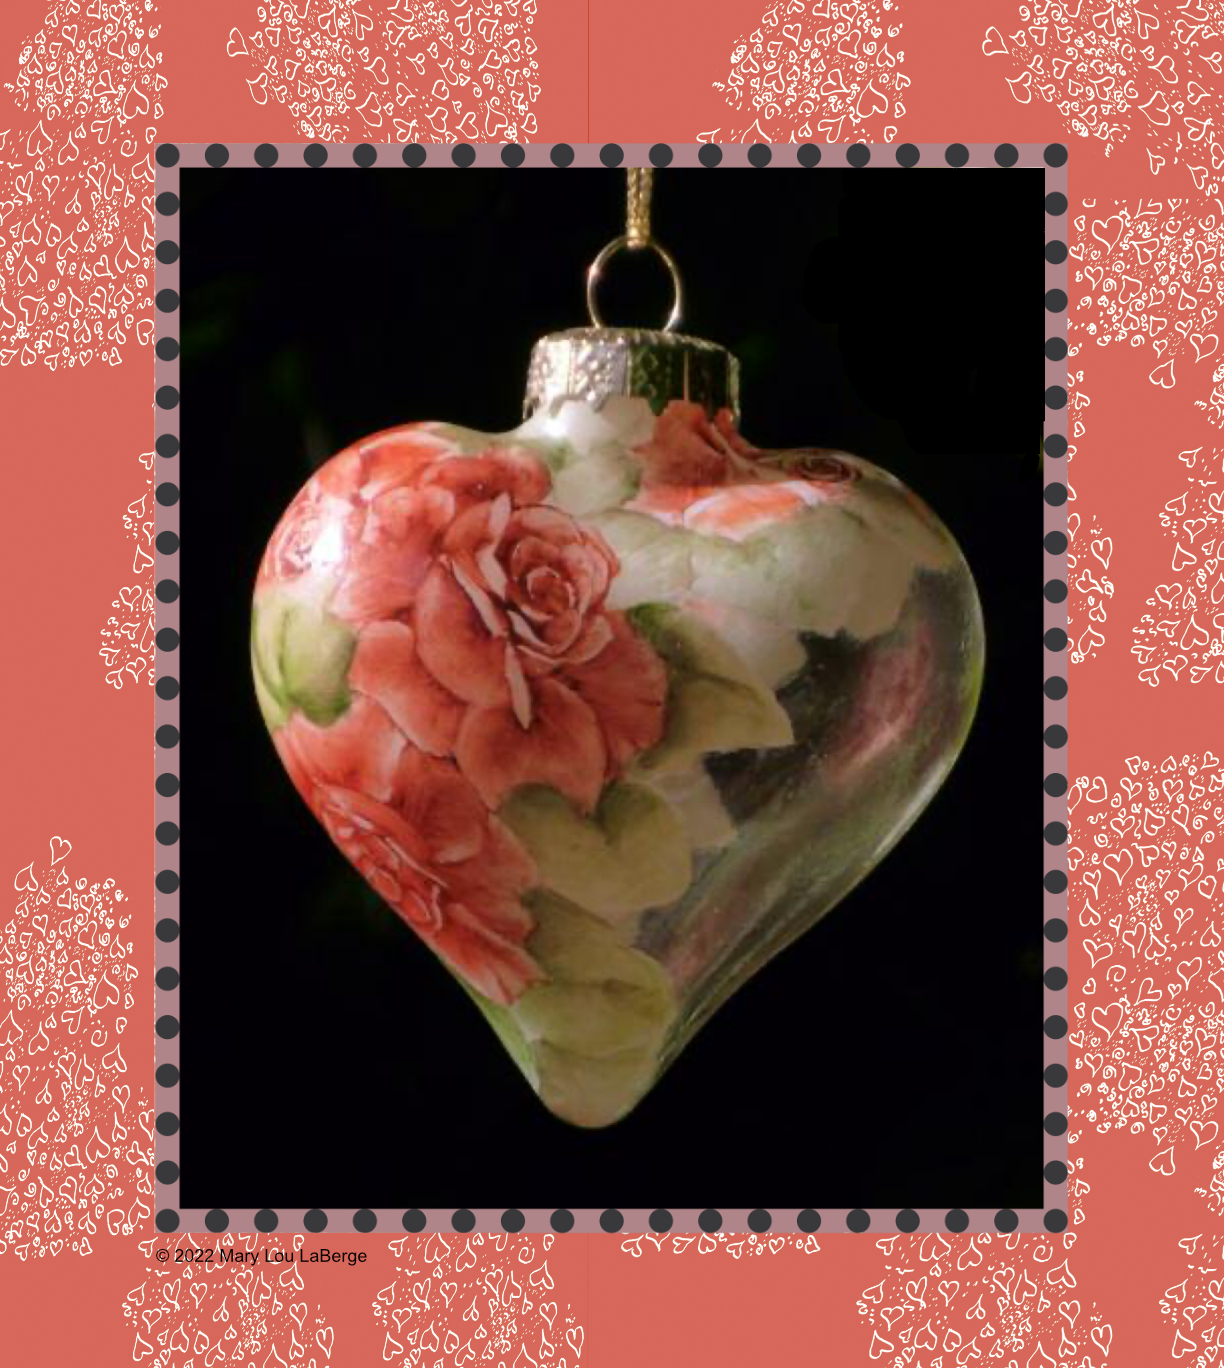
One of the reasons that painting on glass is so interesting, is because the unpainted glass can be creatively worked into a design. For example, on this heart design, the clear glass was left exposed to showcase the see through effect of the front and back painting. So, experimenting with exposed glass in combination with glass paint expanded the design possibilities for future glass projects.
Another lesson learned was to use white paint for glass instead of white paint for china. Usually there is white paint on a china painters pallet. While it is tempting to use the white china paint as a base coat, it will not bond to the glass at the low temperature of Cone 022. What happens to white china paint after firing at a low temperature, is that the china paint will form a powdery layer that rubs off of the glass which isn't a suitable base coat for glass painting. I stress again, the lesson learned was to use white paint formulated for glass instead of white paint made for china.
This glass painting design was fired in an electric kiln.
The glass paint doesn't actually melt into the glass when fired in the electric kiln. The firing process bonds the glass paint onto the glass surface. As each layer of paint is added to the glass painting, it is fired again which causes the paint to adhere to the previous layer of paint on the glass. Building up the layers of paint results in a beautiful work of art that is permanently bonded to the the glass surface.
Glass paint is fired at cone 022 or about 1087 degrees Fahrenheit in an electric kiln. Test fire an unpainted wine glass in your kiln at this temperature. If the wine glass did not slump or melt during the firing cycle, you are ready to fire glass paintings.
Some china paint colors will fire onto glass. If they do, they are on the above supply list. For instance, blood red and sap green china paint will usually fire onto glass. However, this is not the case for all china paint. If you are considering painting with a china paint color from your stash onto glass, test fire a sample just to make sure that it does bond to the glass. From experience, the best approach is to use glass paint formulated for the kiln.
As your painting skills develop, you will want to add more supplies to your stash. Click this link to find a complete glass paint supply list.
There is a list of suppliers provided on this website that stock and sell the above supplies. Click this link to access the supplier information.
Choose inexpensive glass for your painting projects. Avoid using leaded glass crystal. The lead might cause the glass to melt or slump in the kiln.
Following are the painting instructions for this project. You'll find that the instructions refer to a first fire, second fire and third fire phase. More detailed information about this painting technique is located at this link "What is China Painting?" which explains the process in greater detail. Note that this glass painting technique is similar to the china painting technique, however, the difference is that glass paint is fired at a lower temperature, whereas, china paint is fired at a higher temperature.
.....................................
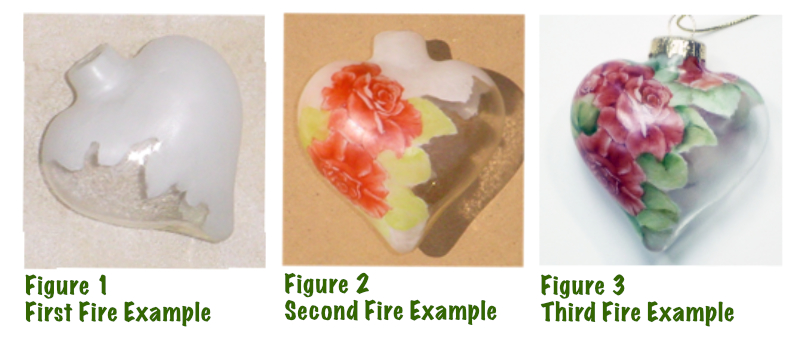
Figure 1 above is an example for the base coat. Paint the white glass paint or white glass enamel onto your ornament. Remove the metal hanger before firing. Lay the ornament on the kiln shelf to fire. Do not use kiln furniture to prop up the ornament. Fire at Cone 022 which is about 1087 degrees Fahrenheit.
There isn't a pattern for this design. However, you can develop a design by using a china marker and draw a basic outline of roses and leaves onto the glass ornament. Paint white over the china marker. The white paint will look grayish as it mixes with the china marker, however, the china marker will fire out in the kiln leaving a bright white painting surface like the example on Figure 1 above.
..................................
Roses
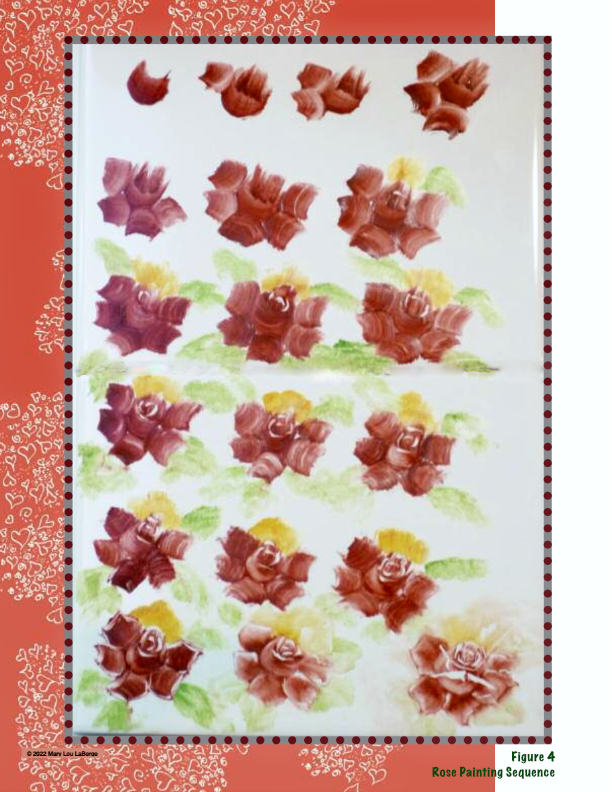
Apply paint in the rose areas using the step by step guide on figure 4 above. Using a wipe out tool, also known as a clay shaper or the corner of a clean stiff brush, follow the steps in the diagram and wipe out the shape of the rose.
With a flat shader brush, gently coax the paint to be lighter in the highlighted areas and darker or heavier in the shadow areas.
Leaves
Paint a light coat of sap green or chartreuse green on the leaves. This layer of paint serves as a base coat for the third fire which is explained below.
Fire in Electric Kiln at Cone 022
As in the first fire, before firing your ornament, remove the metal top. When firing these ornaments in an electric kiln, lay the ornament directly on the shelf in the kiln that has been coated with a kiln wash. Do not use kiln furniture under glass because the glass will form slightly to the shape of the furniture. Because the firing temperature is cone 022, ceramic kiln wash is acceptable on the kiln shelf. If you were firing glass at fusing temperatures (1480 degrees) a glass kiln wash is recommended.
..................................
Roses
Reference figure 3 for this section. It's time to begin painting the shadow areas on the rose petals. Mix blood red and brown green, keeping the paint in the red tones. Using a flat shader brush, carefully brush your paint in or near the crevices between the rose petals. This mixture will result in developing depth in your roses.
Leaves
Referring to figure 3, paint a light coat of sap green or chartreuse green on the leaves in the areas that are light or reflect light. Use brown green in the middle value areas of the leaves.
Where the leaves overlap or where there are shadow areas use a mixture of brown green plus red, keeping the mixture in the greenish tones and then apply the paint to overlapping areas to create depth and shadows. Mixtures of colors like brown green and red cause overlapping leaves to appear more life like.
After the third, fire your ornament will probably be finished. However, if you feel that the artwork could use more detail, add more paint and then fire the ornament in the kiln again. As long as the kiln temperature does not rise above cone 022 you will be able to fire glass multiple times.
E-mail: 💌 marylou@maryloulaberge.com